
We recommend using RAW photographs wherever possible because they preserve a linear relationship between the radiance of light hitting the sensor and the pixel values. However, in many circumstances it is desirable to use non-RAW images for objective image analysis. Examples include the use of cheap smart phones, or compressed video formats. These formats are non-linear, compressing brightness information in a manner which compliments human vision and display screens without much loss of visual information.
Most other software makes the assumption that non-linear images conform to the sRGB standard, however the dynamic range of cameras has increased substantially since that format was introduced, and in practice we have not found any cameras which conform to the standard to an acceptable degree, so wherever possible we recommend modelling the linearisation curves for each camera model manually.
Modelling a camera’s linearisation requires a photograph of a range of grey standards, ideally 6 or more from about 1-2% to 99-100%. This step only needs to be done once per camera.
The linear output images are typically normalised during normal image processing to create images where the pixel values scale with reflectance relative to the standard. This holds true for sRGB images, however it may not be the case for other colour spaces such as DCI-P3, as used in Apple iPad/iPhone cameras. Cameras using colour spaces other than sRGB must therefore be converted to cone-catch values.
When taking JPG photographs ensure any “HDR” effects are turned off – this is incredibly important. HDR effects tend to involve local contrast reduction, meaning the pixel values measured for the standard are not comparable to the values measured anywhere else in the image.
Video Guide
Taking a suitable picture of the standards
It is crucial that the lighting falling on each standard is as perfectly uniform as possible. Make sure the standard is either in full sun in an open space, or in full shade in an open space, with no objects around it. Using artificial light is possible, but not recommended unless you know how to ensure perfectly uniform lighting on each standard.
This method is sensitive to tiny changes in lighting conditions which will be imperceptibly small to your eyes.
Do not photograph too close to the standards (the camera itself will block some light). Ensure the standards are central in the shot.
Take photos with a range of exposures and select the one which has the brightest white standard where none of the pixels are saturated (i.e. all the pixel values are as near to 255 in each channel as possible without actually ever reaching 255).
Modelling
Go: plugins > micaToolbox > Camera Calibration > Model Linearisation Function
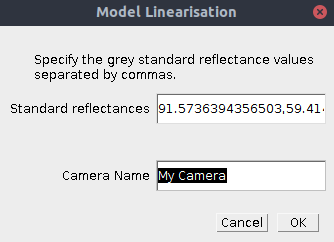
Standard Reflectances: Here you should specify the reflectance values of the grey standards in percentage (0-100 scale). Values should be separated by a comma (it doesn’t matter which order you use). The default values loaded by the script are measurements of an X-Rite ColorChecker passport’s 6 grey levels (note that there may well be some variation between charts and/or error in our measurements).
Camera Name: Choose a name to use for this camera (e.g. make/model).
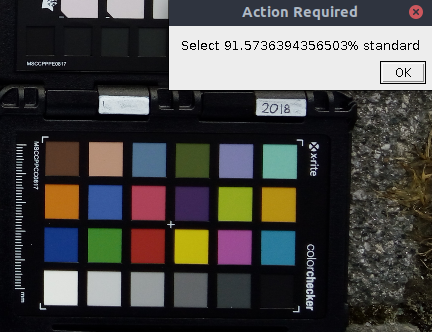
The script will then ask you to select an image containing the standards, and will ask you to draw a selection area over each standard in turn. Simply follow the on-screen prompts.
Selecting the best model
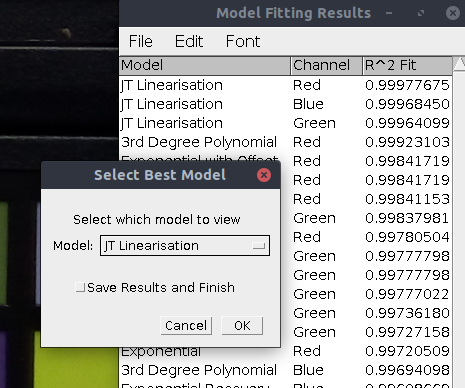
The script will model linearisation curves for your camera using a range of different equations. The equations and their fits are listed in the table (best at the top). Using the “Select Best Model” dialog box to create graphs of the different models.
When you have decided which equations work best tick “Save Results and Finish“:
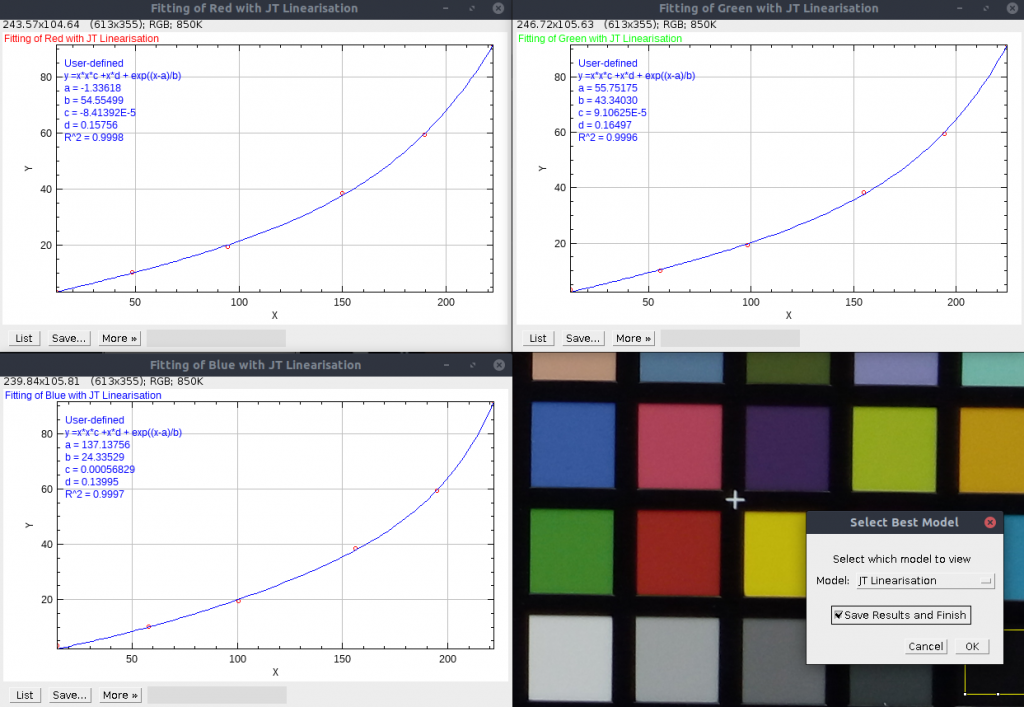
There should be a near perfect fit between the measured pixel values and the standard reflectance values (R^2 values > 0.999 ideally). Pay particular attention to the top and bottom values.
After saving the results you can generate a multispectral image as usual, just select “Custom Non-Linear” under Image Type, and select the camera linearisation model you have just created when prompted.