The Light Enviroment
Water strongly attenuates long wavelenghts of light & UV (see video below, Fig 1). Depending on the visibility and the type of disolved matter in the water, the ambient light quickly turns into a dim blue (clear water), green (algae) or brown (tanins or mud).
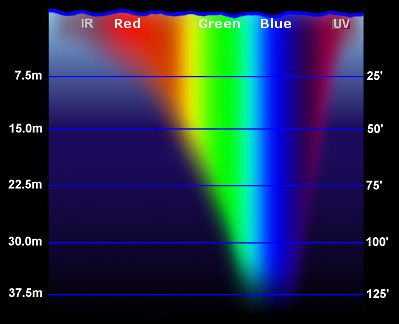
Figure 1: Light attenuation by depth in clear water. Source: Tom Morris, Fullerton College.
While it is crucial to understand that vision and colouration has adapted to a specific light environment, the available amount of light is often insufficient for high quality calibrated photography. As such, underwater photographers are often forced to spend large amounts of time and money on various lighting solutions. Choosing the most suitable lightling solution to your needs is crucial, and should focus on:
- Known illuminant spectra in the image
- Higher focal depth
- Faster shutter speeds
Calibrated digital photography (particularly in the context of image segmentation using luminance thresholds as introduced in QCPA) requires an even level of illumination across a scene or object. While in shallow water the problem of light attenuation is less dominant (or inexistent), caustics (video below) and wave action make high quality photography and even illumination difficult to achieve. Therefore, it can be favourable to seek deeper (>5m) locations and try to solve the lighting issues there.
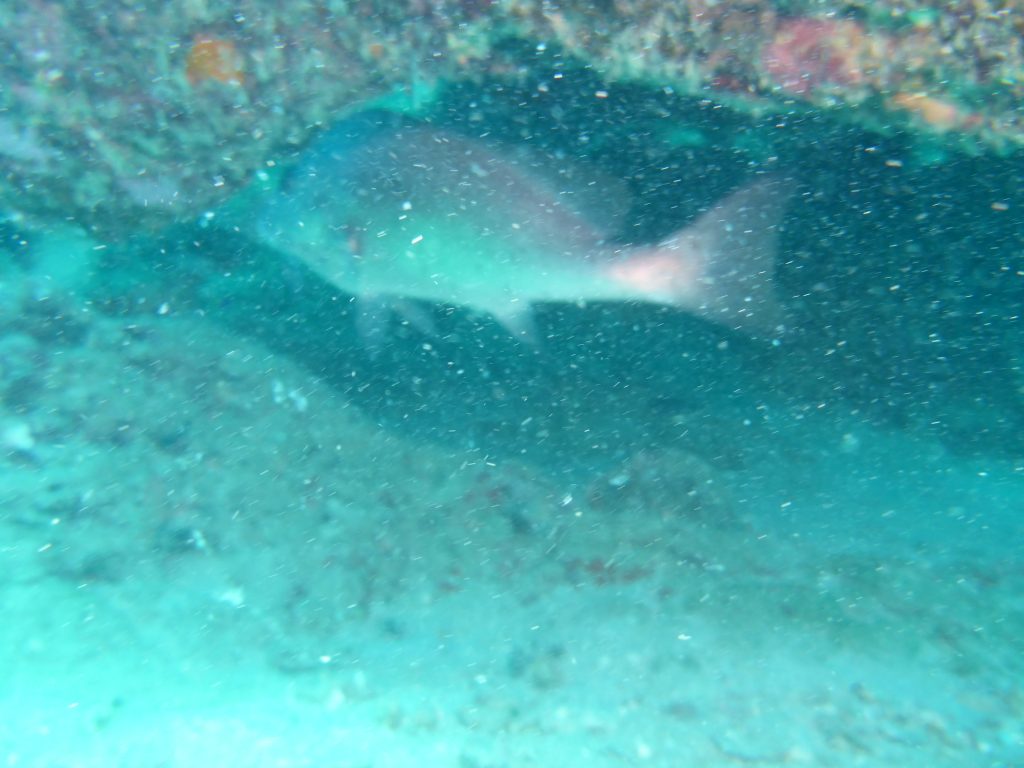
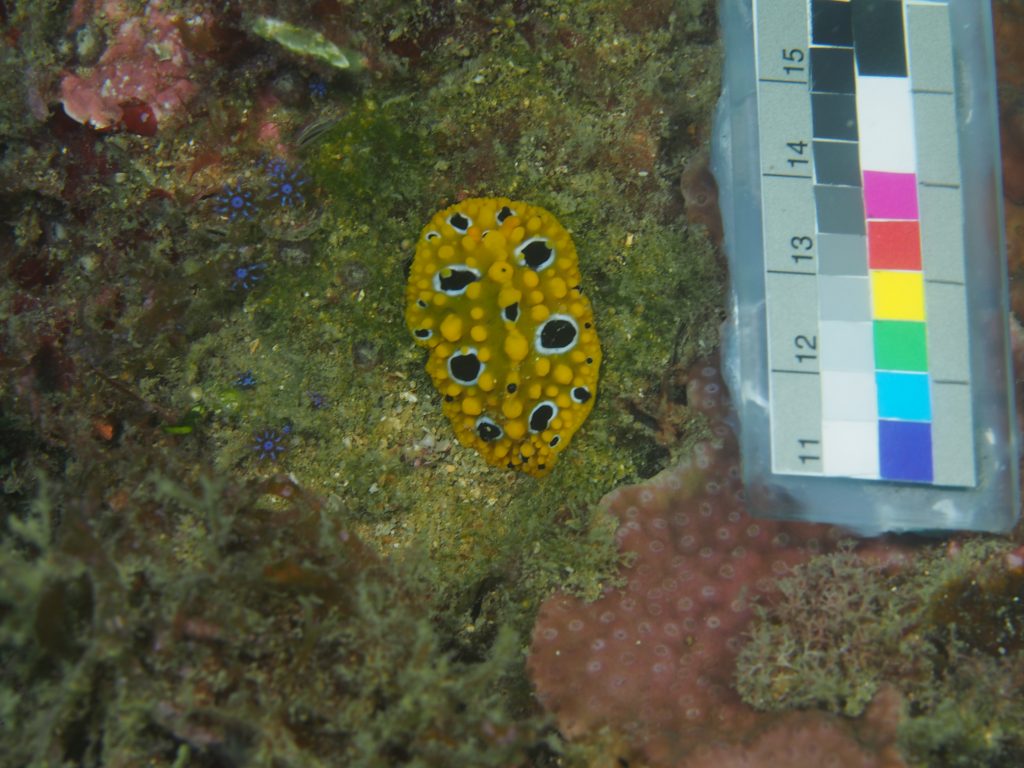
Another issue frequently encountered with underwater photography is backscatter. Backscatter refers to light that gets reflected back into the camera due to particulate matter in the water (Fig 2). This can pose severe limitations and often dictates the type of lens and lighting that can be used under given conditions. The key is to minimise the amount of water between the lens and the object in order to reduce the amount of particulate matter in front of the lens. Wide-angle lenses provide a suitable solution for larger subjects whereas macro-photography usually suffers less from this issue (unless large amounts of background need to be captured, Fig. 3). Another way to minimize backscatter is to use indirect ways of illuminating a scene. There is a rich amount of literature and web-based sources on how to best achieve that.
Lighting solutions
There are four frequently used approaches to lighting in underwater photography:
- Natural light
- Flash lights (strobes)
- Hand-held or camera-mounted video lights
- Ring lights
Natural light:
Taking images using the naturally available light seems straight forward (but not necessary as MICA can simulate any given light environment). It is obiously the cheapest solution too! And yes, if none of the limitations discussed above stand in your way then, yes, try to take your images using natural light (Fig. 4). MICA and QCPA will work just fine. Also, if you want to correct your images to make them ‘as if seen under white light’ for artistic reasons, most camera sensors are good enough these days to capture the slightest remnants of long wavelenths which can be amplified in post-production. However, the result will always be worse than that from a well illuminated image unless you are working really close to the surface. This can be an issue regarding visual modelling as you won’t be able to simulate light environments etc… (e.g. your image at a different depth) if you don’t have the information captured by your camera in the first place.
positive:
– Cheap
– Less backscatter
– Less gear to carry around
negative:
– limited to shallow depths (max. 10-15m)
– unknown illuminant spectra (highly variable)
– Chance of losing information

Flash Lights (Strobes):
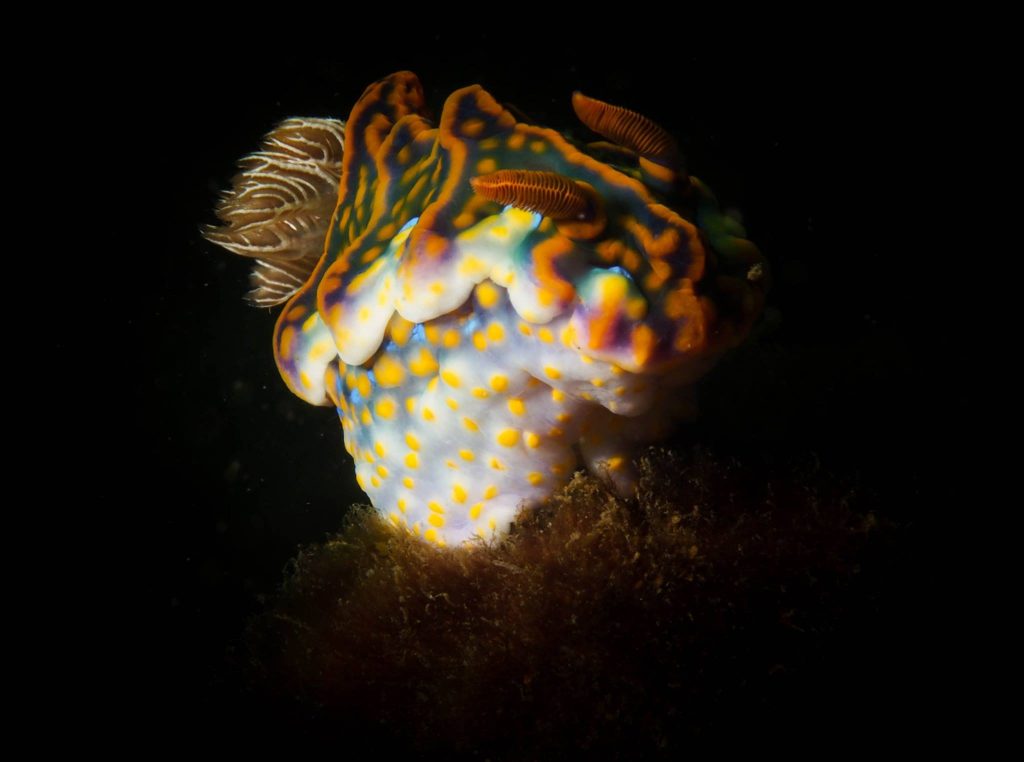
Strobes are probably the most commonly used source of light in underwater photography. They provide brief and powerful bursts of light and can last for an entire day of shooting. However, it is exactly those properties which makes them tricky to use for visual modelling. Because they provide a strong focal source of light they are likely to cast shadows in the image (Fig 5). Shadows which wouldn’t be there naturally and cannot be corrected for in post-production. While these shadows are desired for artistic photography, they are highly unfavourable for visual modelling. Also, because they are not constantly turned on it is hard to gage the resulting lighting in an image prior to taking the shot. Therefore, taking evenly illuminated images using strobes is the way for well-trained underwater photographers. Using multiple strobes and diffusion techniques it is indeed possible to repeatedly achieve evenly illuminanted pictures without artificial shadows. Despite these drawbacks, the amount of light produced by a set of powerful strobes is often the only way to achieve enough illumination to capture larger objects and scenes.
positive:
– Very powerful
– Long battery life
– Relatively cheap ($200-$600 AUD per strobe)
– Good for light sensitive animals (Ambush photography)
negative:
– Difficult to anticipate the resulting image
– Requires high level of skill
Hand-held & Camera-mounted video lights:
Initially designed for videography and functional purposes such as orientation in dim-light, overhead or nighttime conditions, video lights have become a valuable solution for underwater photography. As they provide a contstant source of light it is possible to anticipate the evenness of a shot prior to taking an image which makes the process a lot less time consuming, predictable and repeatable (video below). However, to achieve remotely comparable light intensities to strobes it is necessary to invest substantially into powerful light sources. Recent developments in LED and battery technology have seen the power and battery life of video lights sky rocket while prices have come down significantly. To achieve similar levels of light to a medium range strobe we advise to seek at least 20,000-30,000 lumen of output (and more!). Given that recently marketed video lights have outputs of up to 20,000 lumen, this has become feasible. For any object larger than 30cm that needs to be captured with an adequate amount of background we recommend going well beyond 40,000 lumen. This will set you back approx. $0.1 AUD / Lumen with current prices and technology (2019), making a 40,000 lumen setup cost approx. $4,000 AUD. Using handheld video lights is not recommended due to the interference with camera operation and the usually low ouptut of handheld video lights.
Positive:
– Constant light source
– Can do video & photo
– Often have UV and red light
– Easy for less trained photographers
Negative:
– Heavy
– Expensive
Ring lights:
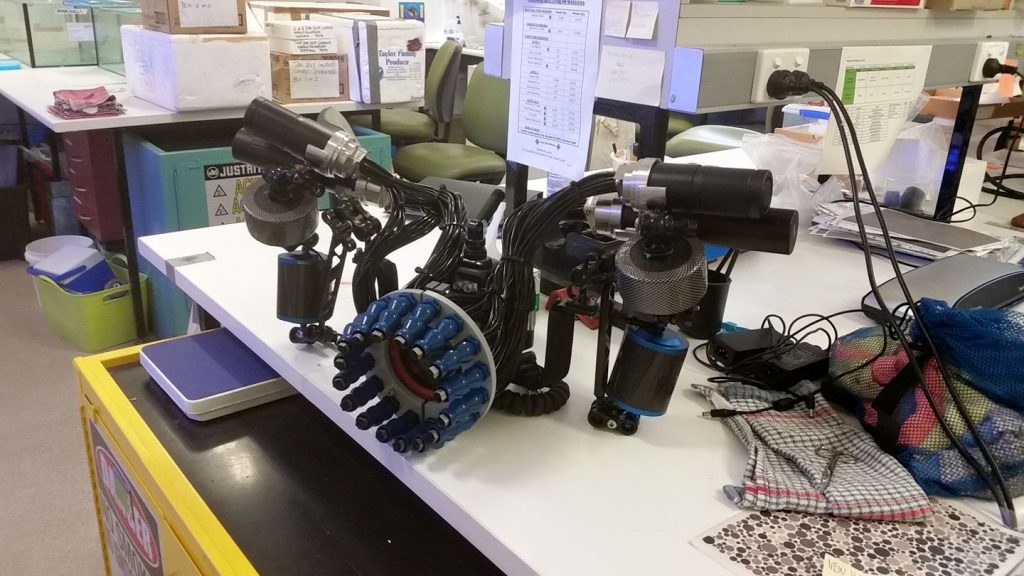
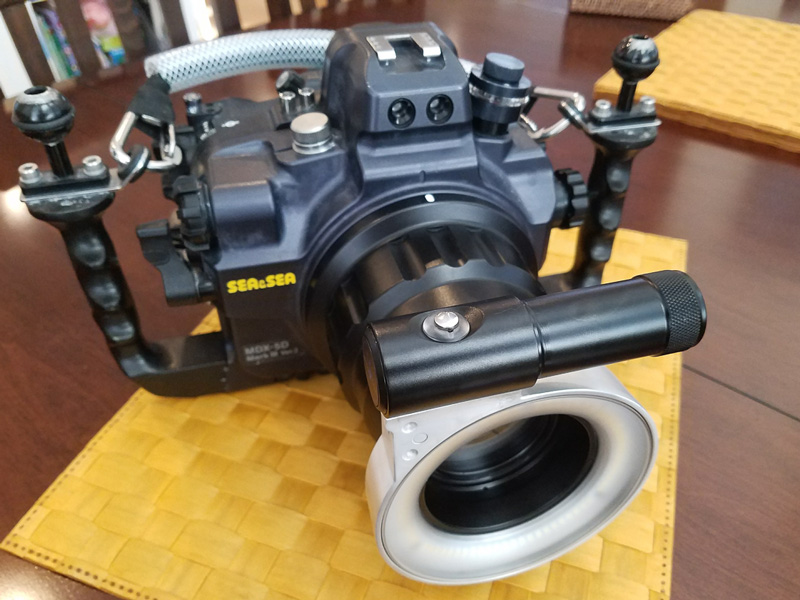
Even illumination can be achieved through various diffusion techniques and the use of multiple light sources at the same time (e.g. as shown above). An well-known (Although not common) alternative approach is the use of ring lights. These can come in three different types: Powered by external video lights (Fig 6), powered by external strobes and powered by built-in LED arrays (Fig. 7). Ring lights are a comparably recent thing for commercially available lighting solutions, particularly the ones with built-in LED arrays. They are usually designed for capturing really small objects from very close up (max. 10 cm). We have successfully managed to increase that distance to up to 1m using custom made video light powered systems. However, these are still highly inefficient and have huge potential for future engineering efforts. Commercially available solutions are either limited to being powered by strobes or built-in LED arrays. However, the latter are currently stil to weak for the capture of significant proportions of visual background or larger subjects. However, this can be mitigated by choosing different types of lenses. A wide angle lens will help to reduce the distance between camera and subject but might introduce image distortion which will have to be corrected.
Positive:
– Extremely even illumination
Negative:
– Can only be used on very small objects
– Can be difficult to fit to a specific camera setup